Jspoelstra (talk | contribs) |
Jspoelstra (talk | contribs) No edit summary |
||
| Line 2: | Line 2: | ||
{{Infobox location |
{{Infobox location |
||
|games =FO3 |
|games =FO3 |
||
| − | |type = |
+ | |type =military |
| − | |image = |
+ | |image =National Guard Depot.jpg |
| + | |image desc =External view of the Depot |
||
| − | |map marker image = |
+ | |map marker image =National Guard Depot loc.jpg |
| − | |part of =[[Megaton]] |
||
| − | | |
+ | |map marker ='''National Guard Depot''' |
| − | | |
+ | |factions =[[National Guard]] (pre-War) |
| + | |robots =[[Fallout 3 robots and computers|Robots]]<br />[[Automated turret (Fallout 3)|Automated turrets]] |
||
| − | |local map =Craterside_Supply_loc.jpg |
||
| + | |refid ={{ID|0011ef}} (exterior)<br />{{ID|01bc93}} (entrance)<br />{{ID|017f57}} (train. wing)<br />{{ID|06f9f8}} (offices)<br />{{ID|0228af}} (armory) |
||
| − | |cell name =MegatonCratersideSupply |
||
| + | |cell name =NtlGuardDepotExterior (ext.)<br />NtlGuardDepot01 (entrance)<br />NtlGuardDepot04 (train. wing)<br />NtlGuardDepot05 (offices)<br />NtlGuardDepot06 (armory) |
||
| − | |refid ={{ID|003a2a}} |
||
| − | |footer =[[file:A-V-S.jpg|240px]]<br />The [[armored Vault 101 jumpsuit]] behind the counter. |
||
}}{{Games|FO3}} |
}}{{Games|FO3}} |
||
| + | Located along the northern edge of Downtown DC, the '''National Guard Depot''' is a high-security compound that used to be the headquarters of the Washington regiments of the National Guard of the Commonwealth of Columbia. |
||
| − | {{quotation|Moira sells all kinds of stuff at her place, Craterside Supply. Take a guess where it is? Heh heh heh heh.|[[Lucas Simms]]}} |
||
| + | Avoiding the metro system, it can be reached from the [[Capital Wasteland|Wasteland]]. It is located directly south of [[Vault 108]] and the [[robot repair center]] (which is directly north of Vault 108). One can also head east from [[Friendship Heights]] along the buildings past the [[Rock Creek Caverns]]. |
||
| − | '''Craterside Supply''' is a store located in [[Megaton]] in ''[[Fallout 3]].'' It can be found by going right and following the path as soon as you enter Megaton. The store opens at 8:00am, and the owner [[Moira Brown]]'s stock, as well as her caps, refresh on Mondays and Thursdays. The shop sells anything one might need, and as most of the [[Megaton settler]]s point out, usually at a good price. Speaking with [[Moira Brown|Moira]] will give you the option of buying items or starting the [[The Wasteland Survival Guide (quest)|The Wasteland Survival Guide]] quest. |
||
| + | ==Background== |
||
| − | Craterside Supply is guarded by a single [[Mercenary (character)|mercenary]] who upon interaction tells you he is watching you, although during her quest he might say, "Leave me out of that girl's crazy experiments. I don't get paid enough for that," referring to the help you are giving Moira. Any negative interaction with Moira, such as stealing or injuring her will lead to the mercenary turning hostile and attacking you. |
||
| + | The depot itself has been severely damaged over the years. Much of the floors and ceiling have collapsed, making navigation difficult. However, despite the damage to the above-ground structure, the bunker (along with its incomplete extension) has managed to survive without much damage. |
||
==Layout== |
==Layout== |
||
| − | === |
+ | ===National Guard Depot=== |
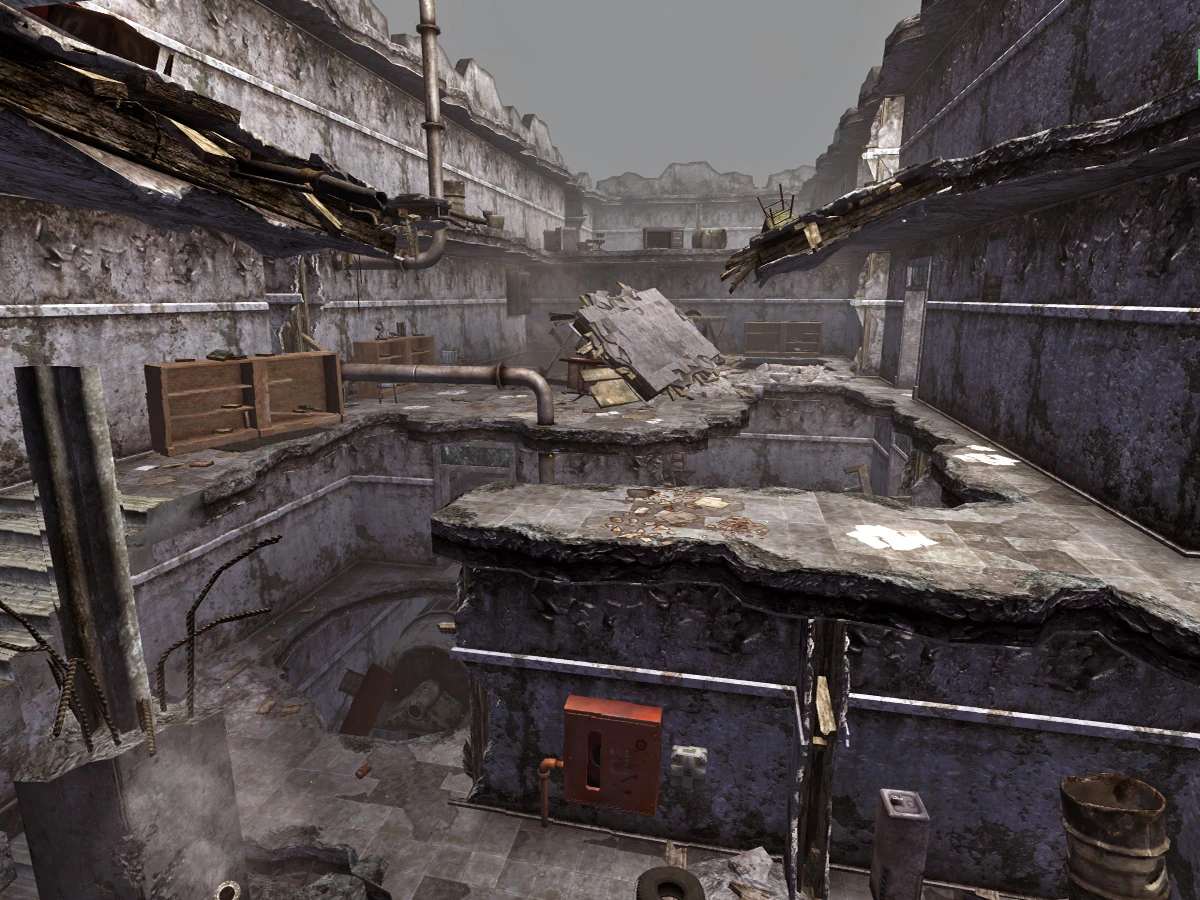
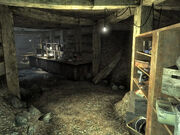
| + | [[file:NG_Depot_interior.jpg|thumb]] |
||
| − | On the right upon entry, the counter is just beyond the entrance, with an [[armored Vault 101 jumpsuit]] behind it and a [[locker]] that contains some of Moira's inventory, but cannot be picked. [[Moira's terminal]] (very easy) is directly to the left which contains information on Moira's experiments. Near that is another fully stocked [[locker]] which can also only be opened with Moira's [[Craterside Supply key|key]]. On another side, the mercenary stands with his back against the wall alongside a [[workbench]] and a doorway. Walking through the doorway leads to the stairway and the bed owned by the mercenary. |
||
| + | Once you enter the building, there will be a stairway to your left. Go up those steps, jump over the pipe and continue on into the office with the flag on the cubicle wall. Proceed past the cubicles and through the door at the north end of the room. Making a left head down the stairs to the southwest. You should at this point be able to see the utility door through the hole in the floor to your left. Continue east to the room with the [[Nuka-Cola vending machine]]s. Next to the second vending machine and [[Eat'o'tronic 3000]] is the door to the depot training wing. |
||
| − | === |
+ | ===Training Wing=== |
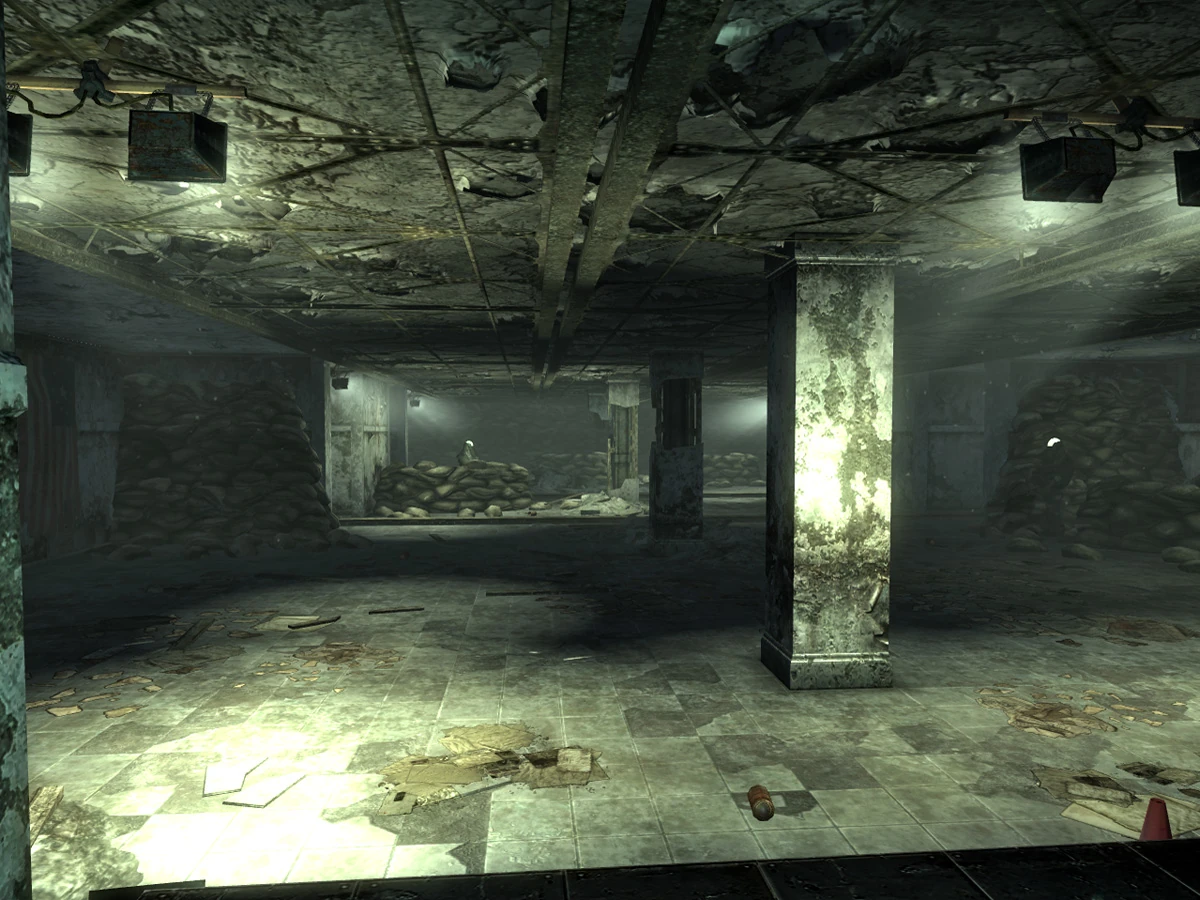
| + | [[File:NGD_training_wing.jpg|thumb]] |
||
| − | Going upstairs will take you to a small living room which contains only a sofa. The opening in this room leads to Moira's bedroom, which contains a hard locked desk and Moira's bed. |
||
| + | Heading east go through one of the two holes in the wall. There is a hallway at the north end of the room. (The door to the east end of the hallway leads upstairs to the room with a [[ Tales of a Junktown Jerky Vendor (Fallout 3)| Tales of a Junktown Jerky Vendor]], a [[pre-War book]] and a safe). Follow the hallway West. Beyond the room with the weapons and ammunition is the locker room - go east to the training grounds. The door in the far southeast corner leads to a supply room with three [[ammunition box]]es and four [[first aid box]]es, past those is the door to the offices. |
||
| − | == |
+ | ===Offices=== |
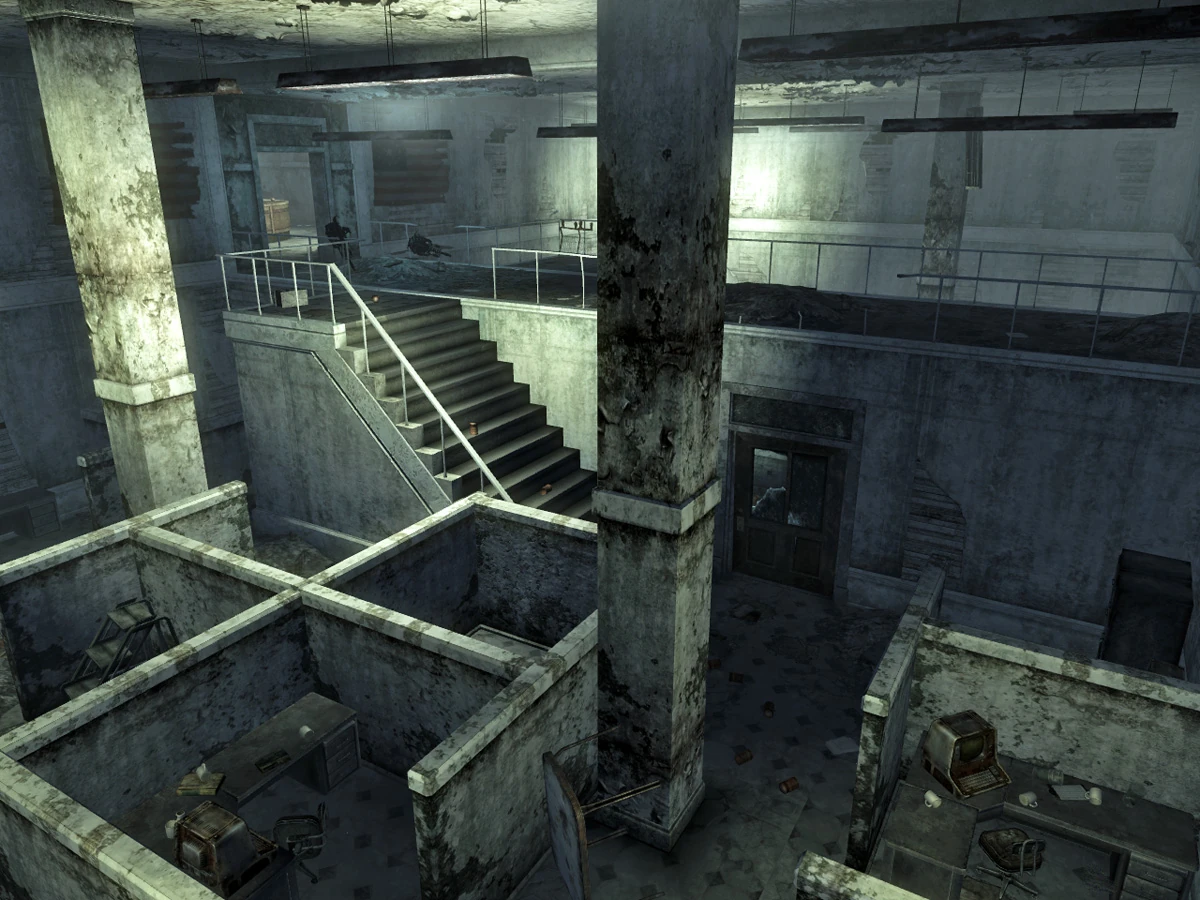
| + | [[file:NGD_offices.jpg|thumb]] |
||
| − | * [[The Wasteland Survival Guide (quest)|The Wasteland Survival Guide]] |
||
| + | At the bottom of the area from the first staircase to the second staircase, there is a turret control terminal, which can be helpful. At the top of the second staircase is a room to the south. Go beyond the desk and up the stairs. At the top of the stairs head west. At the far northwest corner of the room there is some rubble that can be climbed up on to reach the next area. |
||
| + | |||
| + | The door at the top of the rubble has a [[Sentry bot (Fallout 3)|sentry bot]] behind it and leads to the Guard Depot upper floors. (If you take a look at the opposite side, in the upper floor, there are two pre-War books lying on the floor, between two cubicles). |
||
| + | |||
| + | Once back in the depot there is a room with a toppled [[Nuka-Cola vending machine]], in the west corner of the room is the switch to the utility door. From there you can hop over the desk and this can be a good point to attack the [[Sentry bot (Fallout 3)|sentry bot]]. |
||
| + | |||
| + | ===National Guard armory=== |
||
| + | The armory is only accessible after going through the National Guard Training Wing, the National Guard Depot Offices, then exiting from the offices back to the first area of the National Guard Depot (you can also reach the switch from jumping on a slope in the mid level of the room or by jumping to the top level of the building by jumping up the rubble covering the stairs alternating between crouching and standing as you do so). Just as you exit back into the depot, there is an electrical switch about 15 feet to your left. This will unlock the utility door two stories below you, which in turn allows you to enter the armory (the utility door cannot be [[lockpick]]ed, even though it is shown to have a Very Hard lock). Be careful; there is a sentry bot inside the room just behind the door. Activating the second switch inside the utility room will open a trap door that leads into the armory itself. |
||
| + | |||
| + | ===National Guard bunker=== |
||
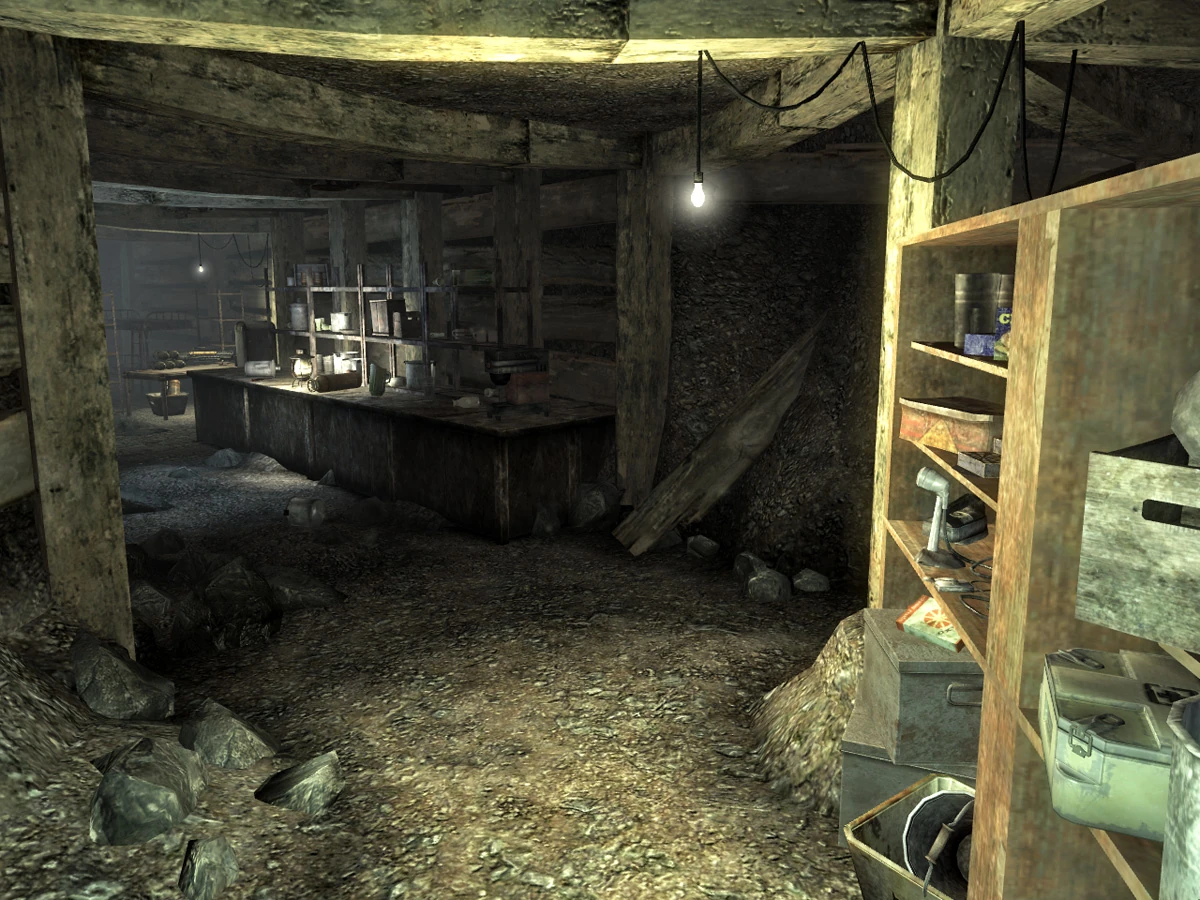
| + | [[File:NGD_armory.jpg|thumb]] |
||
| + | The National Guard bunker, accessed through the National Guard armory, can be opened by completing the unmarked quest ''[[Keller Family Refuge]]'' or relatively easily glitched (see relative page). Inside the bunker is the [[experimental MIRV]] (and a [[Plasma grenade (Fallout 3)|plasma grenade]] hidden in a cooking pot, on the first set of shelves left-hand side). Also five [[Mini nuke (Fallout 3)|mini nuke]]s and a [[U.S. Army: 30 Handy Flamethrower Recipes]] book can be found next to the MIRV, and a [[Nuka-Cola Quantum (Fallout 3)|Nuka-Cola Quantum]] lies in a bin near the back. |
||
| + | |||
| + | [[Keller Senior|Mr. Keller]], a [[Feral ghoul (Fallout 3)#Glowing one|glowing one]] and last "surviving" member of the original Keller Family, can be found here. Also there are two first aid boxes and a [[.32 pistol]] with some ammunition next to the first aid boxes, it will be the first set of shelves you see in the middle of the room, there is also an ammunition box on the opposite shelves, and a safe with another .32 pistol, ammunition, caps, and other random items, built into the desk where the [[Workbench]] is. |
||
| + | |||
| + | ==Inhabitants== |
||
| + | The National Guard Depot is mainly inhabited by [[Sentry bot (Fallout 3)|sentry bot]]s, [[Mister Gutsy (Fallout 3)|Mister Gutsies]], [[Protectron (Fallout 3)|protectron]]s, and [[Robobrain (Fallout 3)|robobrain]]s. Because of this, it would be a good idea to bring along [[Pulse grenade (Fallout 3)|pulse grenade]]s and a powerful weapon if exploring this area. [[Keller Senior|Mr. Keller]] (now a glowing one), can be found in the bunker containing the [[Experimental MIRV]]. |
||
| + | |||
| + | ==Notable loot== |
||
| + | ===Depot=== |
||
| + | {{Notable content |
||
| + | | [[Nikola Tesla and You (Fallout 3)|Nikola Tesla and You]]: located in the National Guard Depot, in a storeroom on the lowest level, on the right shelf (if standing in front of the locked bunker doors). '''GOTY Edition:''' From the Wasteland front entrance > turn left > downstairs > straight to file cabinets > left > left into "Authorized Personnel Only" storeroom > 3 shelving units on the left > center set, second shelf up from floor. |
||
| + | | [[Pre-War book]]: two located in the National Guard Depot on the third floor, up the staircase to the left after entering from the [[Capital Wasteland]], reachable by jumping over the shelves and pipe at the top of the stairs. The books are on the top shelf of the shelves against the left (eastern) wall. There is another set of stairs leading to them against the South wall, in the south-eastern corner of the room. |
||
| + | }} |
||
| + | ===Training Wing=== |
||
| + | {{Notable content |
||
| + | | Go up the eastern staircase and follow the hallway to the only room up there. As you enter there is a standard metal/gray desk directly in front of you with a [[Tales of a Junktown Jerky Vendor (Fallout 3)|Tales of a Junktown Jerky Vendor]] on it. |
||
| + | | [[Pre-War book]] on the shelf above a safe in the same room as the [[Tales of a Junktown Jerky Vendor (Fallout 3)|Tales of a Junktown Jerky Vendor]]. |
||
| + | }} |
||
| + | ===Depot Offices=== |
||
| + | {{Notable content |
||
| + | | [[Duck and Cover! (Fallout 3)|Duck and Cover!]] located on a long counter in an irradiated section. |
||
| + | | Three more [[Pre-War book]]s on the shelves in the center of an open collapsed two floor room, one level above the long counter in an irradiated section as mentioned above. |
||
| + | }} |
||
| + | ===Armory storage=== |
||
| + | [[File:Bobblehead_Small_Guns_NGD.jpg||150px|right]] |
||
| + | {{Notable content |
||
| + | | The [[Bobblehead - Small Guns|Small Guns bobblehead]] located on a shelf in the sealed storage room in the basement of the armory. |
||
| + | | A notably large amount of various assorted weapons and military-type gear. |
||
| + | }} |
||
| + | {{clear}} |
||
| + | ===Armory Bunker=== |
||
| + | {{Notable content |
||
| + | | Five [[Mini nuke (Fallout 3)|mini nuke]]s and the unique [[Fat Man (Fallout 3)|Fat Man]], the [[experimental MIRV]], the single most powerful weapon in ''[[Fallout 3]]''. |
||
| + | | A [[Nuka-Cola Quantum (Fallout 3)|Nuka-Cola Quantum]] (underneath the table that holds the experimental MIRV). |
||
| + | | A copy of [[U.S. Army: 30 Handy Flamethrower Recipes]] (on the same table as the experimental MIRV). |
||
| + | | All of the components for a [[Nuka-grenade (Fallout 3)|Nuka-grenade]] are located in the bunker (Nuka-Cola Quantum, [[tin can]], [[Abraxo cleaner]] and [[Turpentine (Fallout 3)|turpentine]]) so using the [[workbench]] the player can craft one should they have the [[Schematics - Nuka grenade|schematics]]. |
||
| + | }} |
||
==Notes== |
==Notes== |
||
| + | * An [[Brotherhood Outcasts|Outcast]] patrol spawn point is located directly in front of the depot just outside the gate. |
||
| − | * Moira's terminal has a few humorous bits of info on it. The three options are to check the store inventory, [[The Wasteland Survival Guide (quest)|Survival Guide]] progress, and "track current experiments". The current experiments can be found on [[Moira's terminal|this page]]. |
||
| + | * The National Guard Bunker has a number of [[Resting|"free beds"]], 2 [[workbench]]es, and lots of storage. Once the glowing one is dispatched it can be used as [[Fallout 3 player housing|''Fallout 3'' player housing]]. |
||
| − | * If you "noclip" through the wall inside, you will see two lockers. If you open the lockers you will be able to steal themes or objects for your house in Megaton. After stealing nobody will turn hostile, you just lose Karma. |
||
| + | * After completing the [[Waters of Life]] quest, a [[Vertibird]] can be seen flying overhead when in the Depot part of the building. |
||
| − | * The [[Mole rat (Fallout 3)|mole rat]] [[repellent stick]] can be stolen from Moira's hard locked desk upstairs, only if you did not do the optional part for the respected part of the quest. |
||
| + | * Even though the Bunker was supposedly sealed off after the bombs fell, there is often a [[Mirelurk cake|mirelurk cake]] in the fridge, even though [[Mirelurk|mirelurks]] didn't start appearing for quite a while after the Great War. |
||
| − | * If you plan on sneaking in while the Craterside Supply is closed, it should be noted that Moira's guard may still be inside, so enter with caution. |
||
| + | * [[Raider (Fallout 3)|Raiders]] often ambush from the ruined buildings using the fence as cover from direct missile attacks. |
||
| + | * Once you use the electrical switch to open the armory, you cannot close it back. |
||
| + | * It's possible to place a barrel (one is located in the break room immediately prior to the door to the training wing) on the shelf next to the stairs leading down towards that room from the topmost floor. This will create a jump point to access a ledge that reaches the small office where the switch for the armory door is located, eliminating the need to go through the training wing and office areas to activate the switch. |
||
| + | **It is also possible, to use the same barrel located in the break room, place the barrel vertically on the table next to the door in the middle of the room that is in a pile of rubble at an angle, then walk up the door and jump on the barrel. This will allow you to jump further up onto a piece of floor that has fallen in the above room, taking you directly into the room with the door switch. |
||
==Appearances== |
==Appearances== |
||
| − | The |
+ | The National Guard Depot appears only in ''[[Fallout 3]]''. |
==Bugs== |
==Bugs== |
||
| + | * {{Platforms|pc|ps3|xbox360}} You can get inside the bunker without getting the transcripts. To do so, walk into the corner made by the door and bunker access terminal. Then crouch, go into third person view, and twirl the camera around until it says "activate electrical switch". The trigger is very small, but should appear on the door or the door frame, a little higher than the player's head. Activate it, and the bunker door will open. This is a brilliant time saving method and should be used if you don't want to bother hunting down the transcripts. (No longer patched) Although, directly on the other side of that corner of the access terminal wall and bunker (the side with the radiation suits), the same method can be applied and gain you access into the bunker. |
||
| − | * {{Platforms|ps3}} If you enter Craterside Supply a moment or two after it first opens the guard and Moira will react as if you have picked the lock to get in. |
||
| + | * {{Platforms|pc|ps3|xbox360}} A character with high Agility can enter the armory without going through the Training Wing and Depot Offices. Locate the staircase in the middle of the eastern wall of the National Guard Depot, and climb to the top. From there, head due west past the fallen steel truss, around or over the gap in the floor, and go through the open doorway. Straight ahead is a pile of fallen floors or walls blocking another staircase. By jumping up the left side of this rubble (place a barrel to jump on) and then crouching, it's possible to climb the rubble and stairs to gain access the highest level of the building. From there, head to the far southeast corner where you can jump down to the electrical switch to the armory. |
||
| − | * {{Platforms|ps3}} Using the right stick to pick up an item may result in Moira and her Mercenary guard attacking the player as if witnessed stealing. |
||
| − | * {{Platforms| |
+ | * {{Platforms|pc|ps3|xbox360}} There is another way to get up using only one barrel at the northwestern end of the second floor down, push a barrel to the top of the ramp, and jump to the top. |
| + | * {{Platforms|pc|ps3|xbox360}} There is a way to get to the top of the National Guard Depot building by only having to use two barrels. The player has to go to the middle of the fourth floor then go to the fallen radio tower and the caved in ceiling. From there the player has to put a barrel on the radio tower and jump on it from the collapsed ceiling, putting the player on the fifth floor. The player then has to go to the inaccessible stair case with the emergency lights. Put a barrel on the patch of rubble by the collapsed cubicle. Jump on the tallest corner of the collapsed cubicle, then jump on the barrel and then to the top floor. |
||
| + | * {{Platforms|xbox360}} Yet another method to get to the top floor in the depot is simply to go to the collapsed staircase which ''looks'' impossible to get through, but with just a little jerking you can sneak through the small gap in the "ruined" staircase. Go to the left side of the staircase, crouch, back up a little and jump onto the rubble. Crouching before jumping will keep you crouched when you land. Simply walk forward and jump over the remaining rubble blocking the door way. When you get through and topside, simply walk over to the place where the switch is, at the far end of the depot. |
||
==Gallery== |
==Gallery== |
||
| − | <gallery |
+ | <gallery> |
| + | Fallout3 NationalGuardDepot01 ThX.jpg|The [[experimental MIRV]] with mini nukes. |
||
| − | Craterside Supply int1.jpg |
||
| − | Craterside Supply int2.jpg|View when entering |
||
| − | Craterside Supply upstairs.jpg|Upstairs |
||
</gallery> |
</gallery> |
||
| − | |||
| − | {{Navbox Megaton}} |
||
[[Category:Fallout 3 locations]] |
[[Category:Fallout 3 locations]] |
||
| − | [[Category: |
+ | [[Category:Military and research facilities]] |
| − | [[Category:Fallout 3 shop]] |
||
| + | [[ru:База Национальной гвардии]] |
||
| − | [[ru:Магазин на кратере]] |
||
| − | [[ |
+ | [[de:Depot der Nationalgarde]] |
| + | [[es:Almacén de la Guardia Nacional]] |
||
| − | [[it:Spaccio di Craterside]] |
||
| − | [[zh: |
+ | [[zh:National Guard Depot]] |
Revision as of 18:18, 7 November 2012
Fallout 3 locations project
This article is within the scope of the Fallout 3 locations project. This project is dedicated to standardizing Fallout 3 location articles. For participation, please check the project page.
|
Located along the northern edge of Downtown DC, the National Guard Depot is a high-security compound that used to be the headquarters of the Washington regiments of the National Guard of the Commonwealth of Columbia.
Avoiding the metro system, it can be reached from the Wasteland. It is located directly south of Vault 108 and the robot repair center (which is directly north of Vault 108). One can also head east from Friendship Heights along the buildings past the Rock Creek Caverns.
Background
The depot itself has been severely damaged over the years. Much of the floors and ceiling have collapsed, making navigation difficult. However, despite the damage to the above-ground structure, the bunker (along with its incomplete extension) has managed to survive without much damage.
Layout
National Guard Depot

Once you enter the building, there will be a stairway to your left. Go up those steps, jump over the pipe and continue on into the office with the flag on the cubicle wall. Proceed past the cubicles and through the door at the north end of the room. Making a left head down the stairs to the southwest. You should at this point be able to see the utility door through the hole in the floor to your left. Continue east to the room with the Nuka-Cola vending machines. Next to the second vending machine and Eat'o'tronic 3000 is the door to the depot training wing.
Training Wing

Heading east go through one of the two holes in the wall. There is a hallway at the north end of the room. (The door to the east end of the hallway leads upstairs to the room with a Tales of a Junktown Jerky Vendor, a pre-War book and a safe). Follow the hallway West. Beyond the room with the weapons and ammunition is the locker room - go east to the training grounds. The door in the far southeast corner leads to a supply room with three ammunition boxes and four first aid boxes, past those is the door to the offices.
Offices

At the bottom of the area from the first staircase to the second staircase, there is a turret control terminal, which can be helpful. At the top of the second staircase is a room to the south. Go beyond the desk and up the stairs. At the top of the stairs head west. At the far northwest corner of the room there is some rubble that can be climbed up on to reach the next area.
The door at the top of the rubble has a sentry bot behind it and leads to the Guard Depot upper floors. (If you take a look at the opposite side, in the upper floor, there are two pre-War books lying on the floor, between two cubicles).
Once back in the depot there is a room with a toppled Nuka-Cola vending machine, in the west corner of the room is the switch to the utility door. From there you can hop over the desk and this can be a good point to attack the sentry bot.
National Guard armory
The armory is only accessible after going through the National Guard Training Wing, the National Guard Depot Offices, then exiting from the offices back to the first area of the National Guard Depot (you can also reach the switch from jumping on a slope in the mid level of the room or by jumping to the top level of the building by jumping up the rubble covering the stairs alternating between crouching and standing as you do so). Just as you exit back into the depot, there is an electrical switch about 15 feet to your left. This will unlock the utility door two stories below you, which in turn allows you to enter the armory (the utility door cannot be lockpicked, even though it is shown to have a Very Hard lock). Be careful; there is a sentry bot inside the room just behind the door. Activating the second switch inside the utility room will open a trap door that leads into the armory itself.
National Guard bunker
The National Guard bunker, accessed through the National Guard armory, can be opened by completing the unmarked quest Keller Family Refuge or relatively easily glitched (see relative page). Inside the bunker is the experimental MIRV (and a plasma grenade hidden in a cooking pot, on the first set of shelves left-hand side). Also five mini nukes and a U.S. Army: 30 Handy Flamethrower Recipes book can be found next to the MIRV, and a Nuka-Cola Quantum lies in a bin near the back.
Mr. Keller, a glowing one and last "surviving" member of the original Keller Family, can be found here. Also there are two first aid boxes and a .32 pistol with some ammunition next to the first aid boxes, it will be the first set of shelves you see in the middle of the room, there is also an ammunition box on the opposite shelves, and a safe with another .32 pistol, ammunition, caps, and other random items, built into the desk where the Workbench is.
Inhabitants
The National Guard Depot is mainly inhabited by sentry bots, Mister Gutsies, protectrons, and robobrains. Because of this, it would be a good idea to bring along pulse grenades and a powerful weapon if exploring this area. Mr. Keller (now a glowing one), can be found in the bunker containing the Experimental MIRV.
Notable loot
Depot
- Nikola Tesla and You: located in the National Guard Depot, in a storeroom on the lowest level, on the right shelf (if standing in front of the locked bunker doors). GOTY Edition: From the Wasteland front entrance > turn left > downstairs > straight to file cabinets > left > left into "Authorized Personnel Only" storeroom > 3 shelving units on the left > center set, second shelf up from floor.
- Pre-War book: two located in the National Guard Depot on the third floor, up the staircase to the left after entering from the Capital Wasteland, reachable by jumping over the shelves and pipe at the top of the stairs. The books are on the top shelf of the shelves against the left (eastern) wall. There is another set of stairs leading to them against the South wall, in the south-eastern corner of the room.
Training Wing
- Go up the eastern staircase and follow the hallway to the only room up there. As you enter there is a standard metal/gray desk directly in front of you with a Tales of a Junktown Jerky Vendor on it.
- Pre-War book on the shelf above a safe in the same room as the Tales of a Junktown Jerky Vendor.
Depot Offices
- Duck and Cover! located on a long counter in an irradiated section.
- Three more Pre-War books on the shelves in the center of an open collapsed two floor room, one level above the long counter in an irradiated section as mentioned above.
Armory storage
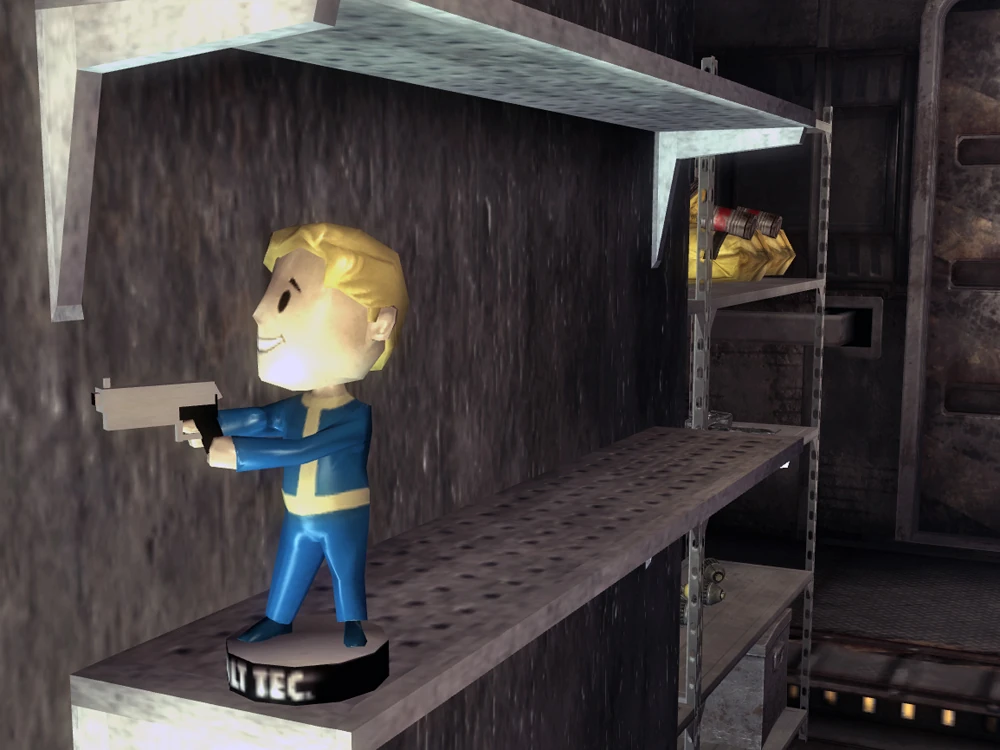
- The Small Guns bobblehead located on a shelf in the sealed storage room in the basement of the armory.
- A notably large amount of various assorted weapons and military-type gear.
Armory Bunker
- Five mini nukes and the unique Fat Man, the experimental MIRV, the single most powerful weapon in Fallout 3.
- A Nuka-Cola Quantum (underneath the table that holds the experimental MIRV).
- A copy of U.S. Army: 30 Handy Flamethrower Recipes (on the same table as the experimental MIRV).
- All of the components for a Nuka-grenade are located in the bunker (Nuka-Cola Quantum, tin can, Abraxo cleaner and turpentine) so using the workbench the player can craft one should they have the schematics.
Notes
- An Outcast patrol spawn point is located directly in front of the depot just outside the gate.
- The National Guard Bunker has a number of "free beds", 2 workbenches, and lots of storage. Once the glowing one is dispatched it can be used as Fallout 3 player housing.
- After completing the Waters of Life quest, a Vertibird can be seen flying overhead when in the Depot part of the building.
- Even though the Bunker was supposedly sealed off after the bombs fell, there is often a mirelurk cake in the fridge, even though mirelurks didn't start appearing for quite a while after the Great War.
- Raiders often ambush from the ruined buildings using the fence as cover from direct missile attacks.
- Once you use the electrical switch to open the armory, you cannot close it back.
- It's possible to place a barrel (one is located in the break room immediately prior to the door to the training wing) on the shelf next to the stairs leading down towards that room from the topmost floor. This will create a jump point to access a ledge that reaches the small office where the switch for the armory door is located, eliminating the need to go through the training wing and office areas to activate the switch.
- It is also possible, to use the same barrel located in the break room, place the barrel vertically on the table next to the door in the middle of the room that is in a pile of rubble at an angle, then walk up the door and jump on the barrel. This will allow you to jump further up onto a piece of floor that has fallen in the above room, taking you directly into the room with the door switch.
Appearances
The National Guard Depot appears only in Fallout 3.
Bugs
 You can get inside the bunker without getting the transcripts. To do so, walk into the corner made by the door and bunker access terminal. Then crouch, go into third person view, and twirl the camera around until it says "activate electrical switch". The trigger is very small, but should appear on the door or the door frame, a little higher than the player's head. Activate it, and the bunker door will open. This is a brilliant time saving method and should be used if you don't want to bother hunting down the transcripts. (No longer patched) Although, directly on the other side of that corner of the access terminal wall and bunker (the side with the radiation suits), the same method can be applied and gain you access into the bunker.
- A character with high Agility can enter the armory without going through the Training Wing and Depot Offices. Locate the staircase in the middle of the eastern wall of the National Guard Depot, and climb to the top. From there, head due west past the fallen steel truss, around or over the gap in the floor, and go through the open doorway. Straight ahead is a pile of fallen floors or walls blocking another staircase. By jumping up the left side of this rubble (place a barrel to jump on) and then crouching, it's possible to climb the rubble and stairs to gain access the highest level of the building. From there, head to the far southeast corner where you can jump down to the electrical switch to the armory.
- There is another way to get up using only one barrel at the northwestern end of the second floor down, push a barrel to the top of the ramp, and jump to the top.
- There is a way to get to the top of the National Guard Depot building by only having to use two barrels. The player has to go to the middle of the fourth floor then go to the fallen radio tower and the caved in ceiling. From there the player has to put a barrel on the radio tower and jump on it from the collapsed ceiling, putting the player on the fifth floor. The player then has to go to the inaccessible stair case with the emergency lights. Put a barrel on the patch of rubble by the collapsed cubicle. Jump on the tallest corner of the collapsed cubicle, then jump on the barrel and then to the top floor.
- Yet another method to get to the top floor in the depot is simply to go to the collapsed staircase which looks impossible to get through, but with just a little jerking you can sneak through the small gap in the "ruined" staircase. Go to the left side of the staircase, crouch, back up a little and jump onto the rubble. Crouching before jumping will keep you crouched when you land. Simply walk forward and jump over the remaining rubble blocking the door way. When you get through and topside, simply walk over to the place where the switch is, at the far end of the depot.